
Have a need to upgrade Windows to 64 bit from 32 bit in Windows 10/8/7 since your memory is not used? How to upgrade 32 bit to 64 bit? This post shows you some things that you should check out, as well as the way to perform Windows 64 bit upgrade.
When installing Windows 7, 8 or Windows 10, you may choose to install the 64-bit version instead of the 32-bit version. If you have installed a 32-bit operating system, you may change it to a 64-bit system.
If you want to actually use more than 4GB of RAM, probably you need a 64-bit version of Windows. With the additional access to memory, you can run more apps simultaneously.
And the system improves productivity with memory-intensive tasks, such as virtual machines, video editing, and web browsing when dealing with a lot of open tabs.
Besides, it's not surprising that many applications now require a 64-bit operating system due to that limitation. Moreover, you can run x64 and x86 applications on a 64-bit OS, but that is not possible on a 32-bit OS.
How to Convert 32 Bit to 64 Bit Windows 7/8/10 without Data Loss Move 1: Make Sure Your Processor Is 64-Bit Capable
Then, you will see one of the following system type:
- 64-bit operating system, x64-based processor: Your CPU support 64-bit and you have already installed the 64-bit version of Windows 10. So, you don’t need to upgrade to 64 bit.
- 32-bit operating system, x64-based processor: Your CPU supports 64-bit, but you have installed the 32-bit version of Windows.
- 32-bit operating system, x86-based processor: Your CPU supports 32-bit and you have installed the 32-bit version of Windows.
To be specific, if you see the second entry, you are in luck and you can move on to the next section to continue Windows 10 64 bit upgrade since your CPU can run a 64-bit version. But if you see the third entry, you cannot install a 64-bit OS since your CPU doesn’t support 64-bit.
Move 2: Ensure Your PC Hardware Has 64-Bit Drivers Available Move 3: Back up Your PC
Since you are making major changes to your operating system, it is indispensable to make a full backup of Windows 10. When you upgrade 32 bit to 64 bit in Windows 10/8/7, your personal files, settings, and applications will be deleted. And the best thing is to back up all the affected files to your external hard drive or USB drive to avoid data loss.
To back up your important files, you need a free backup program to help you. Which one is worth recommending? MiniTool ShadowMaker, a piece of professional file backup software, will be a good option.
With the help of this freeware, you can create an image file for files & folders, Windows operating system, disk or partition. Besides, it can help you to sync files to other locations for backup. Above all, automatic file backup, differential & incremental backup can be created.
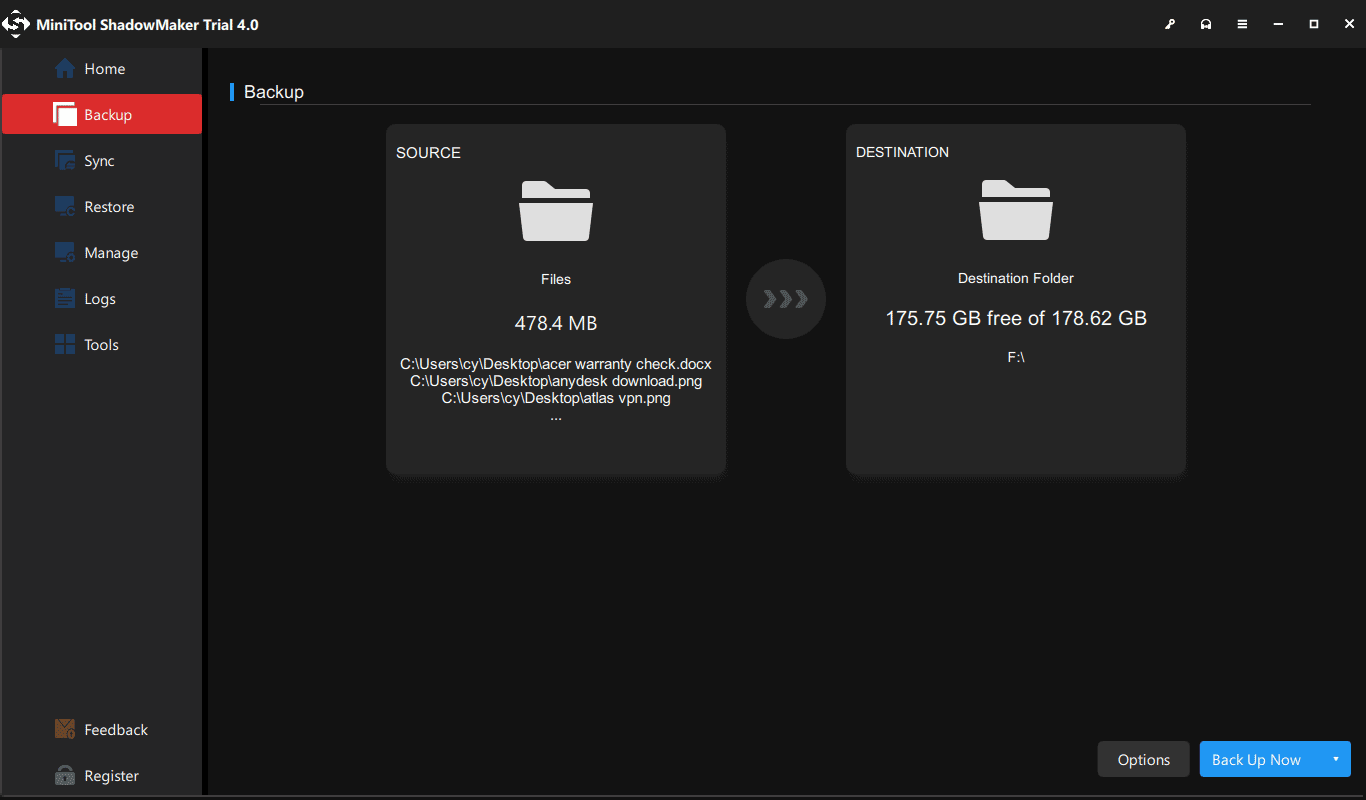
Step 1: Double-click on this program to open it. Click Keep Trial to continue using the Trial Edition and then hit the Connect button in This Computer to start a local backup.

Step 2: Which feature should you use to back up files, Backup or Sync? Both are available. And here, you take the first feature as an example.
In the Backup window, you need to decide which files to back up and where to save the backup image file. Just go to the Source section and choose personal files you want to back up.
Then, go to the Destination section and choose an external hard drive, USB flash drive, Network or NAS as the storage path.
Step 3: Finally, start the full backup of your important files by hitting the Back up Now button.
Move 4: Upgrade Windows to 64 Bit
Create a Bootable USB Drive
Take Windows 10 64 bit upgrade as an example. Right now, insert your USB flash drive with at least 4GB of storage space to your device and go on.
Step 1: Open the official web page to download Windows 10 Media CreationTool.
Step 2: Click Download tool now under Create Windows 10 installation media.
Step 3: Double-click on the MediaCreationTool.exe to run this utility and then accept the Microsoft terms.
Step 4: Check the option Create installation media (USB flash drive, DVD or ISO file) for another PC.
Step 5: Please choose language and edition. To upgrade Windows 10 to 64 bit, here please specify the 64-bit (x64) option for Architecture.
Step 6: Choose the USB flash drive option so as to create a bootable USB drive. Additionally, you can also check the option ISO file but you need to burn the file to a USB drive or CD/DVD. Here, we recommend the first one.
Step 7: Next, all your drives on your computer will be listed. Just choose the USB flash drive from the list to continue.
Step 8: Then, this tool will start downloading needed files and creating a bootable drive from ISO file that is compatible with Windows 10 64 bit.
You can also read this post to learn the detailed steps to upgrade to 64 bit.
News From
 MiniTool Solution
 Category: Data Recovery Services Profile: MiniTool Solution Ltd. is a software development company based in Canada. As a dedicated software development company, MiniTool Solution Ltd. provides customers with complete business software solutions in the data recovery and partition management industry.


